On this page
Create a Dialogue Node
A Dialogue Node defines a passage of dialogue for a character within the
Dialogue Sequence. It is associated with a character which can be used to
enhance the displayed dialogue. You can find all sorts of Dialogue Sequence
examples in the Parley
examples
folder.
Prerequisites
- Familiarise yourself with the Dialogue Node docs.
- Parley is installed and running in your Godot Editor.
- You have followed the instructions to add the relevant characters to the system.
- You have created a basic Dialogue Sequence before. Consult the Getting Started guide for more info.
Instructions

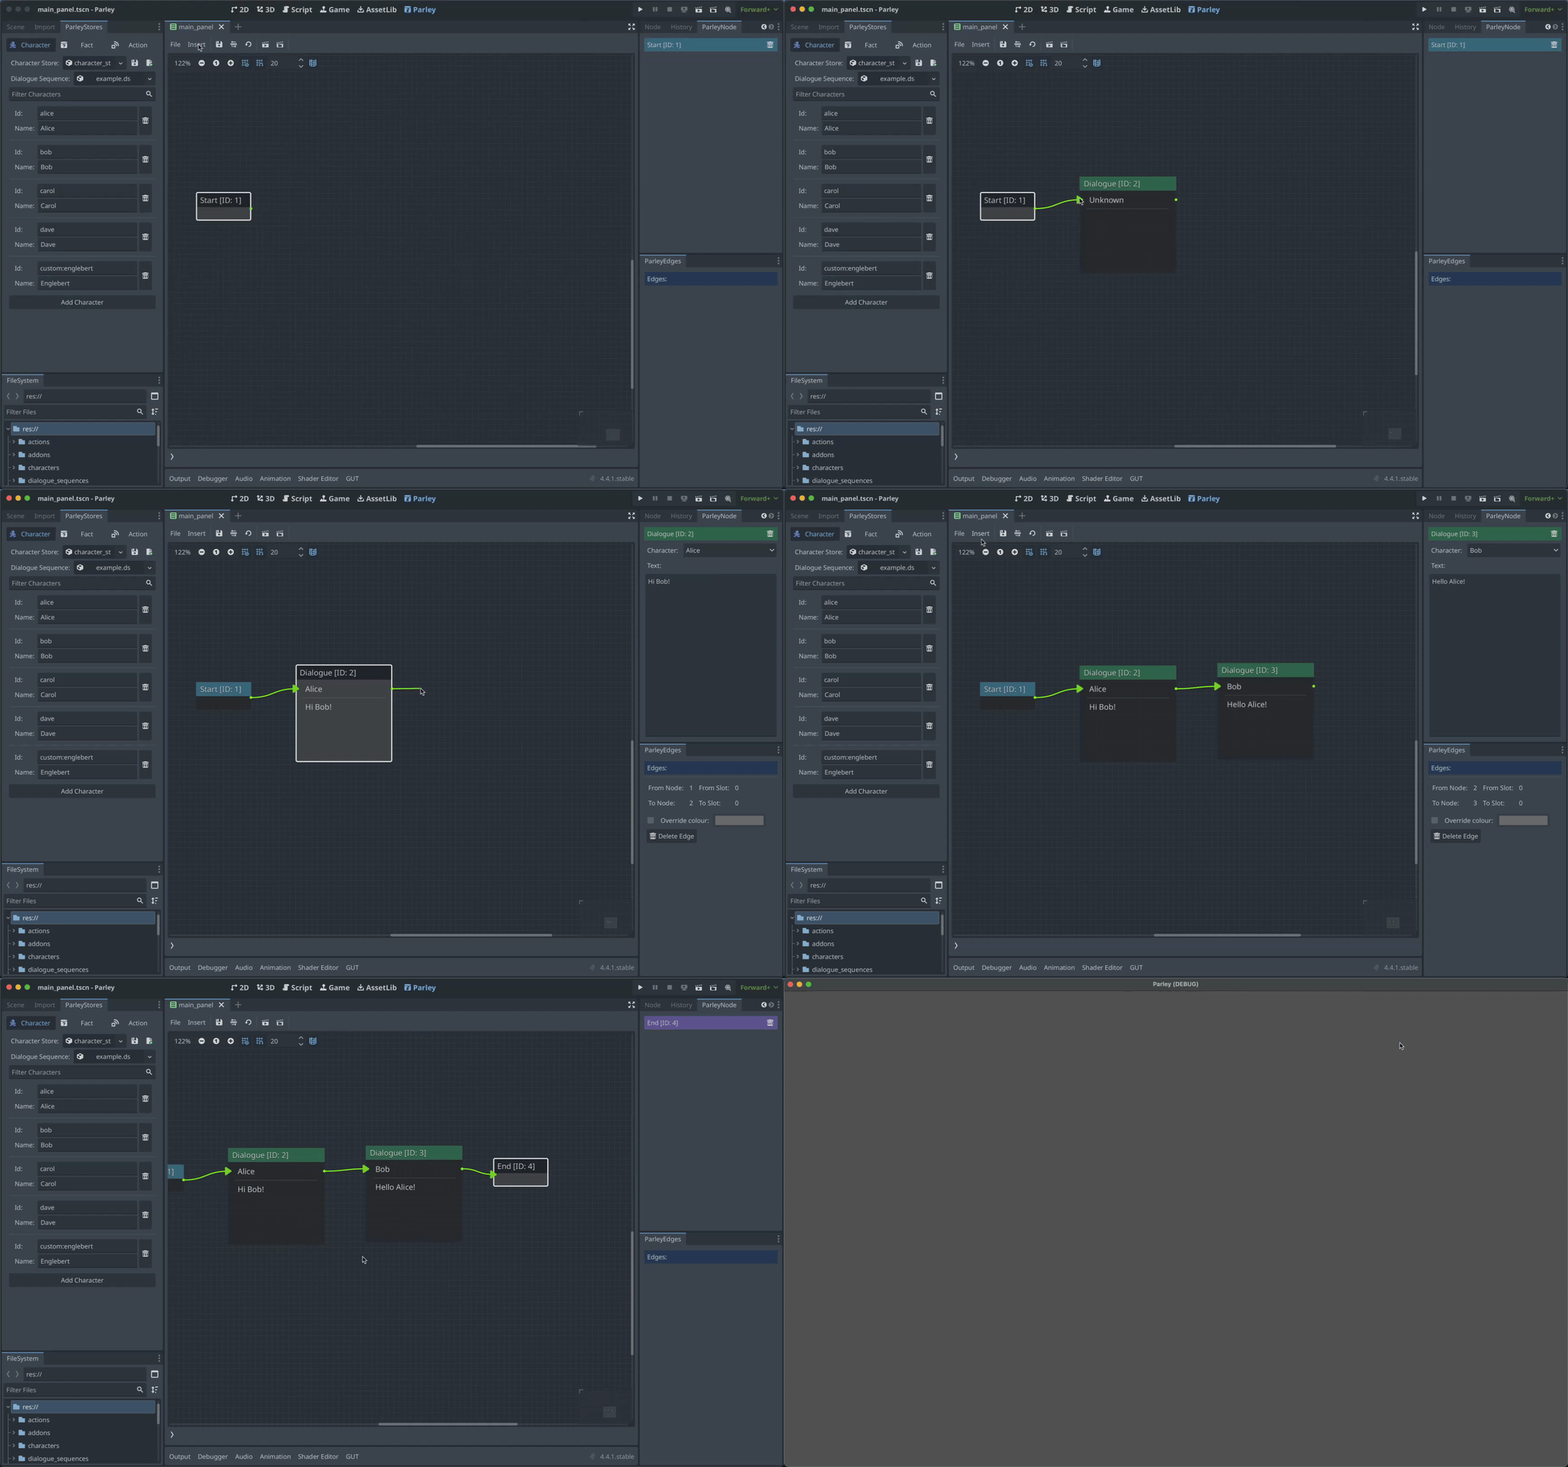
- Create a Dialogue Node using the
Insertdropdown. - Click on the created Dialogue Node in the graph view to open up the Dialogue Node Editor.
- Choose a character for your Dialogue Node from the dropdown.
- Write some text for your Dialogue that will be displayed to the user.
- Click the
Savebutton in the Parley Editor and there we have it! Our first Dialogue Sequence with dialogue. - Now connect this Node up with other Nodes to continue the Dialogue Sequence with your awesome game writing!
- You can test out your Dialogue Sequence by clicking the Test Dialogue Sequence From Start Button.
TipYou can quickly create Dialogue Nodes by creating an edge on the right hand side of the Noe and dragging it into empty space. A Dialogue Node will be created when the mouse is released.