On this page
Create a Dialogue Sequence
A Dialogue Sequence is a conversational structure for a branching dialogue between multiple characters for a particular scene or scenes. They can include:
- The raw dialogue itself
- Options for the player to select
- Conditions to only render dialogue in certain situations
- Actions that trigger upon events within Dialogue Sequence.
- And much much more!
To find out more about the concepts behind Dialogue Sequences, please click here
For more information on creating nodes within your Dialogue Sequences, please refer to the following guides:
- Create a Dialogue Node
- Create a Dialogue Option Node
- Create a Condition Node
- Create a Match Node
- Create an Action Node
- Create a Start Node
- Create an End Node
- Create a Group Node
Prerequisites
- Ensure you have familiarised yourself with the key Parley concepts.
- Parley is installed and running in your Godot Editor.
Instructions

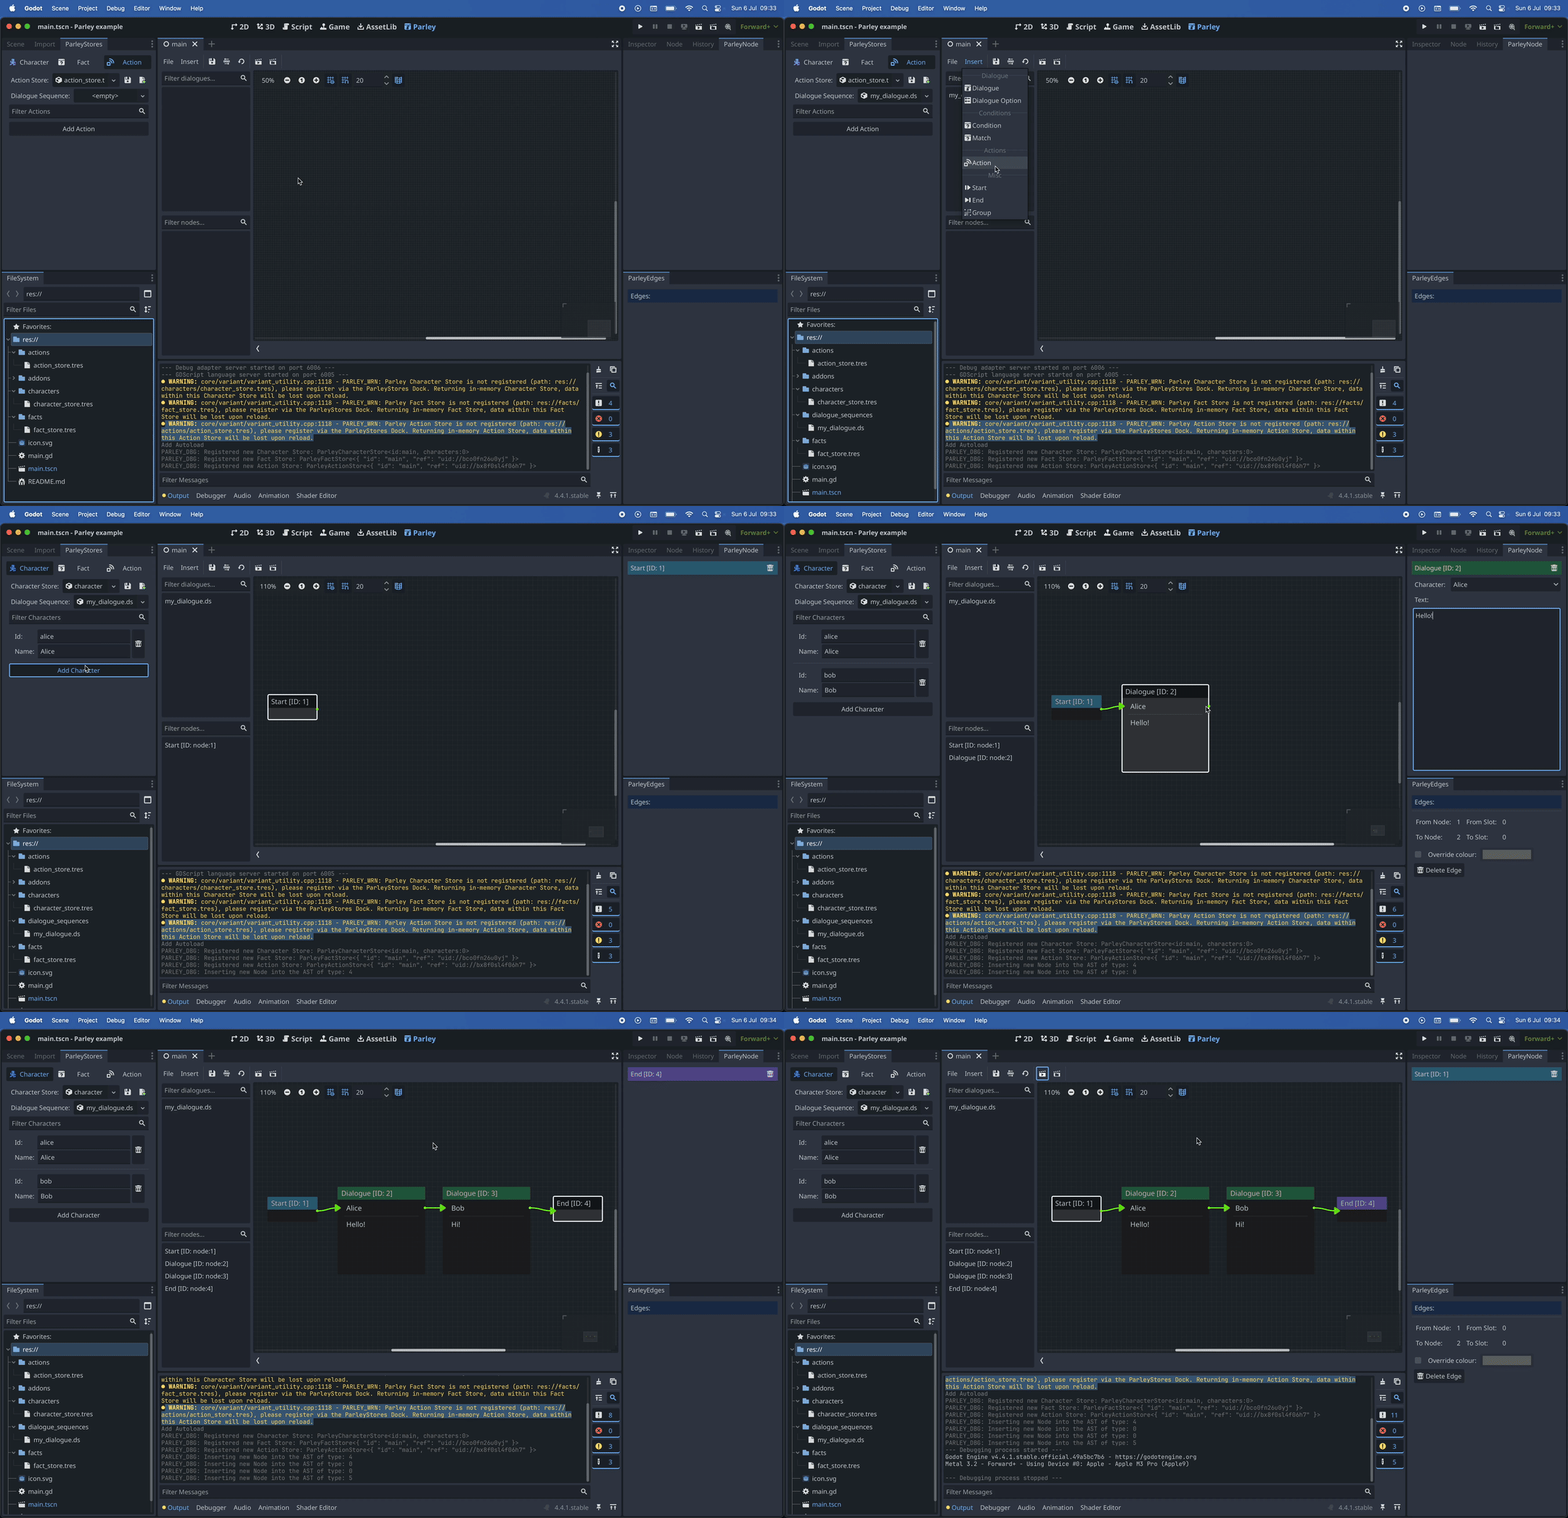
TipIf you’d like to access and follow along using the supporting video instead, please find the original mp4 here.
- Navigate to the main Parley view by clicking
Parleyat the top of the editor. - In the Parley view, click
Fileand selectNew Dialogue Sequence...to open theNew Dialoguemodal. - Set the path of where you want to store your Dialogue Sequence. In our
example, we set this to:
res://dialogue_sequences/my_dialogue.ds.
InfoThe
.dsfile extension is a special type of extension created by Parley to differentiate Dialogue Sequence resources from others. It usesJSONsyntax.
- Set the title of your Dialogue Sequence. In our example, we set this to:
My Dialogue Sequence. - Click
Createto create the Dialogue Sequence. - Now let’s start populating the Dialogue Sequence with Nodes! We start by
creating a Start Node, by selecting
Insert->Startin the main Parley view. - Before, we create Dialogue Nodes, create two characters in the Character
Store by navigating to the
Charactertab in theParleyStoresdock. In our example, we call themAliceandBob. - Save the created characters in the Character store by clicking the save button in the ParleyStores dock.
- Then, create some Dialogue Nodes and connect up with Edges using the Node slots in the main Parley view.
- Finally, create an End Node to complete our simple Dialogue Sequence, by
selecting
Insert->Endin the main Parley view. - Save the Dialogue Sequence by clicking the save button in the main Parley view.
- You can test out your Dialogue Sequence by clicking the Test Dialogue Sequence From Start Button.