On this page
Create a Jump Node
A Jump Node allows one to link Dialogue Sequences together by “jumping” from one
Dialogue Sequence to another. You can find all sorts of Dialogue Sequence
examples in the Parley
examples
folder.
Prerequisites
- Familiarise yourself with the Jump Node docs.
- Parley is installed and running in your Godot Editor.
- You have created a basic Dialogue Sequence before. Consult the Getting Started guide for more info.
- You have two Dialogue Sequences ready to use. One for “jumping” from and one for “jumping” to.
Instructions

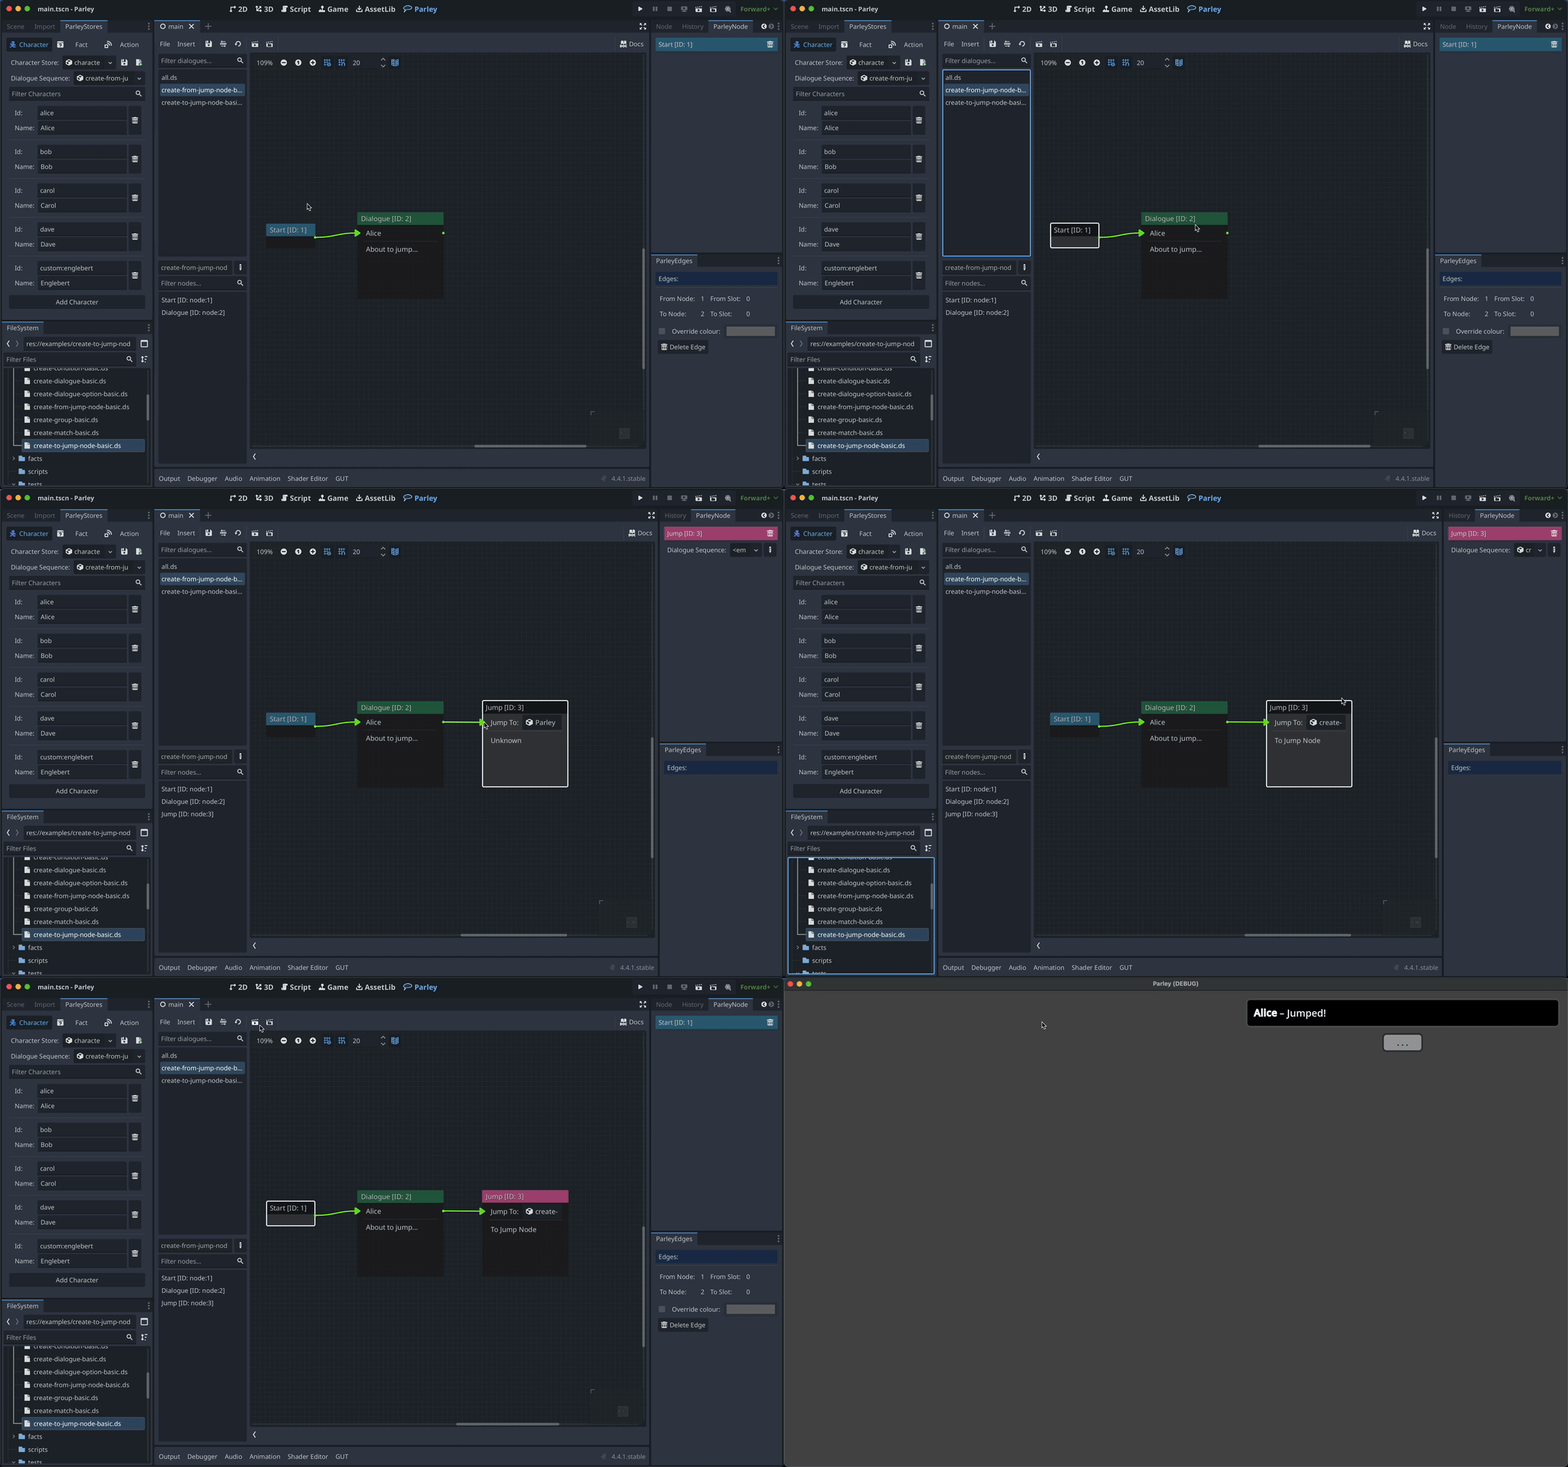
- Create a Jump Node using the
Insertdropdown. - Click on the created Jump Node in the graph view to open up the Jump Node Editor.
- In the Jump Node Editor, choose a Dialogue Sequence to jump to either by dragging a Dialogue Sequence into the Resource Editor component or by using the Resource Editor dropdown menu. In this example, we drag the target Dialogue Sequence into the Resource Editor area.
- Click the
Savebutton in the Parley Editor and there we have it! Our first Dialogue Sequence with Jump Nodes. - You can test out your Dialogue Sequence by clicking the Test Dialogue Sequence From Start Button and ensure that the Dialogue Sequence jumps to the target Dialogue Sequence.